| Back to Index |
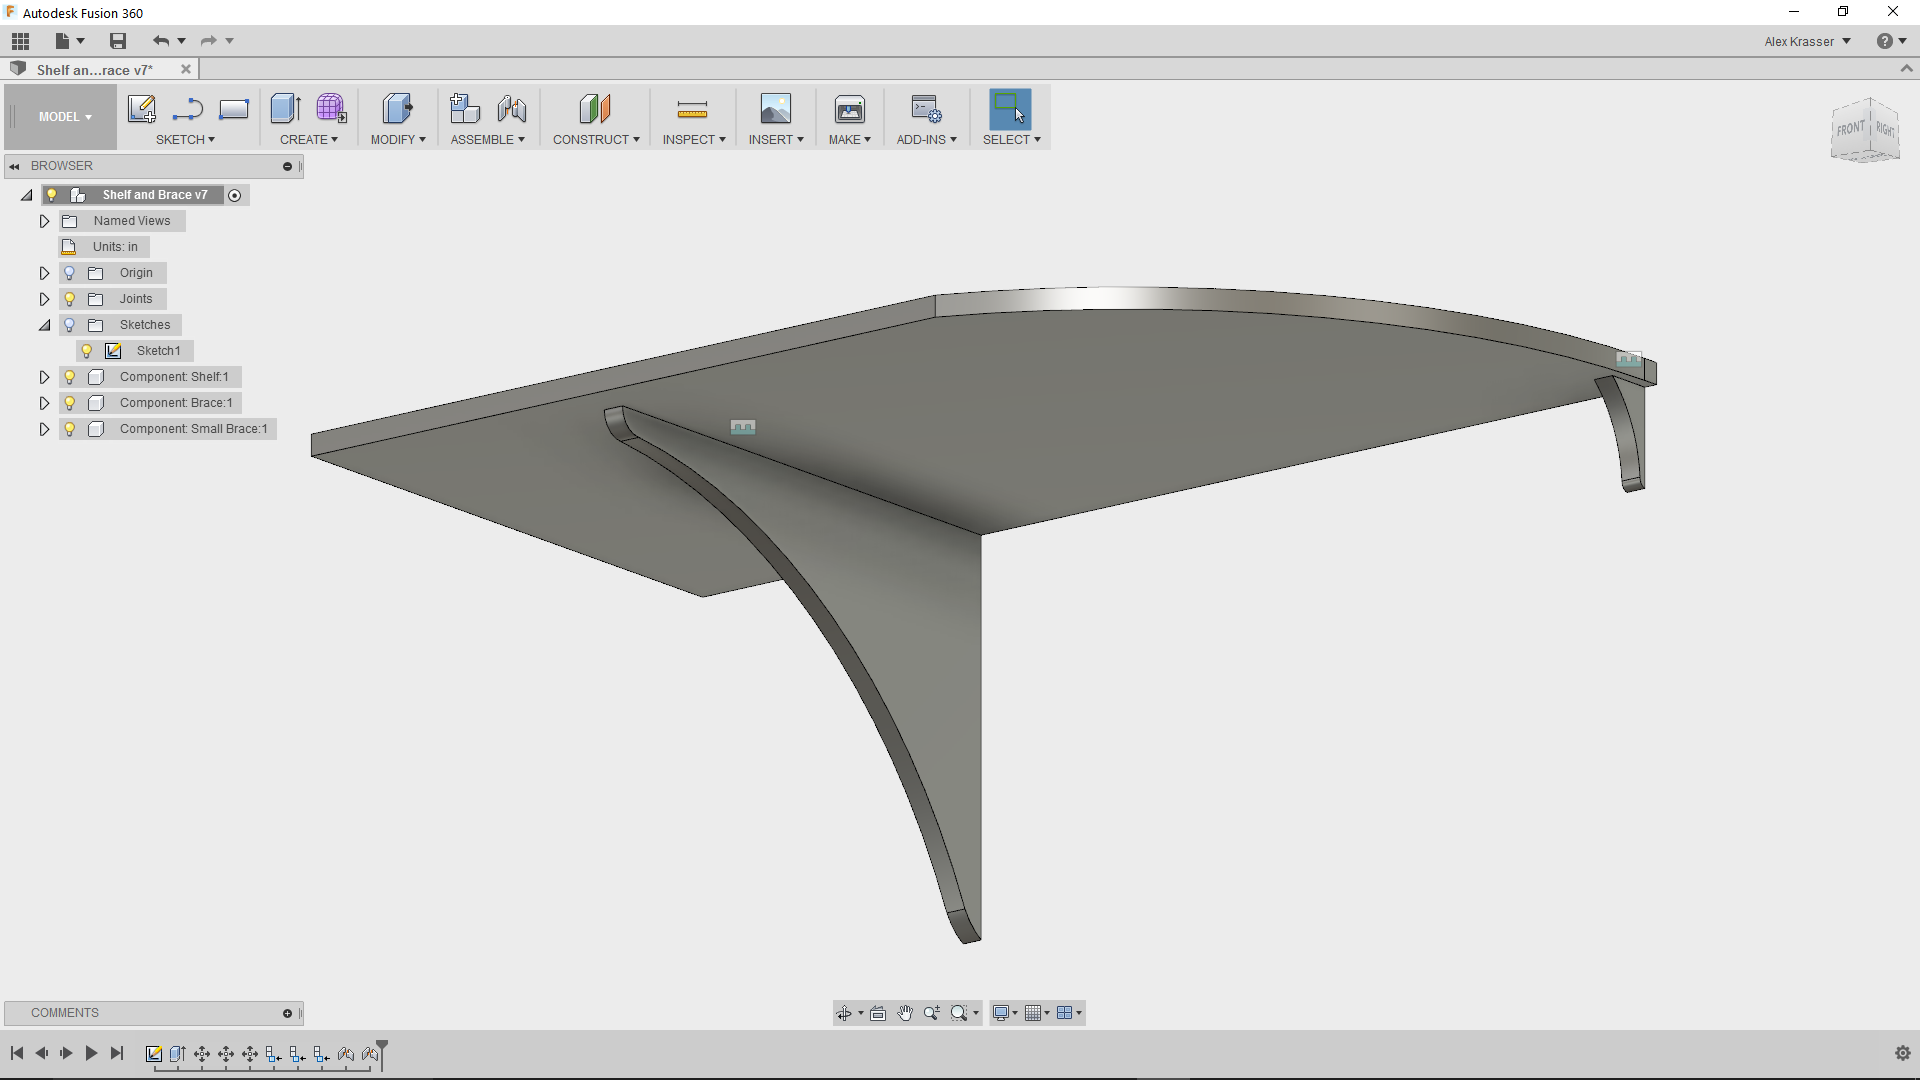
In the interest of time management, it seemed wise to go to the ShopBot orientation session with a file ready to work with. This way, the orientation information could be immediately applied. So I rushed home after class and threw together a quick design for a closet shelf I've been meaning to make. It was only my second or third session on Fusion 360, but I was pleased to find that I generally knew the simple things I'd need to do to be able to draw up the simple shelf design, and all tolled, it took about 45 minutes from start to finish. During that time, I also learned how to use the "component" and "join" features to virtually assemble ("join") my shelf pieces - a useful skill, especially for my upcoming challenge of turning a .dxf version of my airplane into a 3-D one. I exported my Fusion 360 sketch as a .dxf file, which I could open in the VCarve Pro tool-path software.
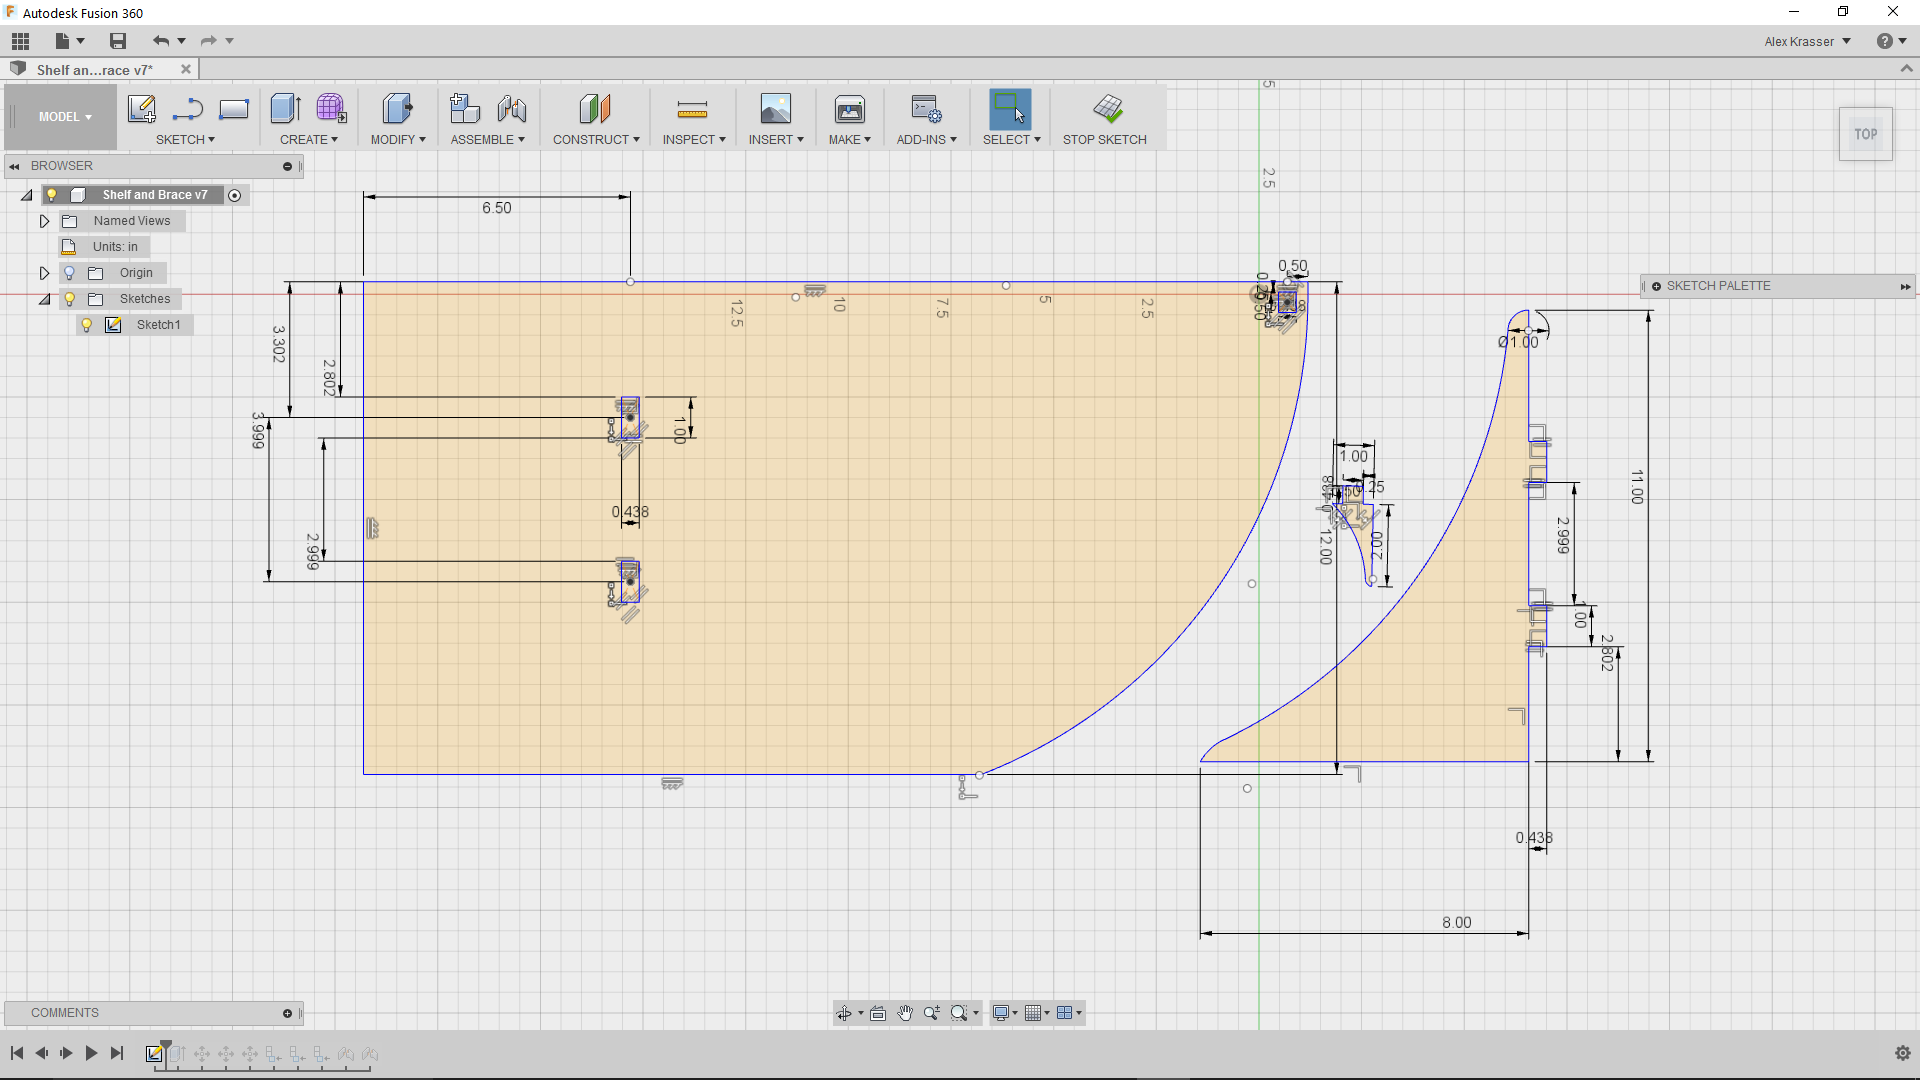
I designed the tabs and slots for 7/16 (.4375") plywood. When I got to the shop, I measured the OSB (crappy but cheap) ply, and depending on where you measured it, the thickness varied from .43 - .52 inches. For a nicer piece, I'd go back in to Fusion 360 and change the design parameters for a slightly thicker piece of wood. However, considering this was a quick-and-dirty Shopbot trial with some crappy plywood, I figured it was close enough. Besides, I could just do some quick sanding on the final pieces to get the tabs to fit.
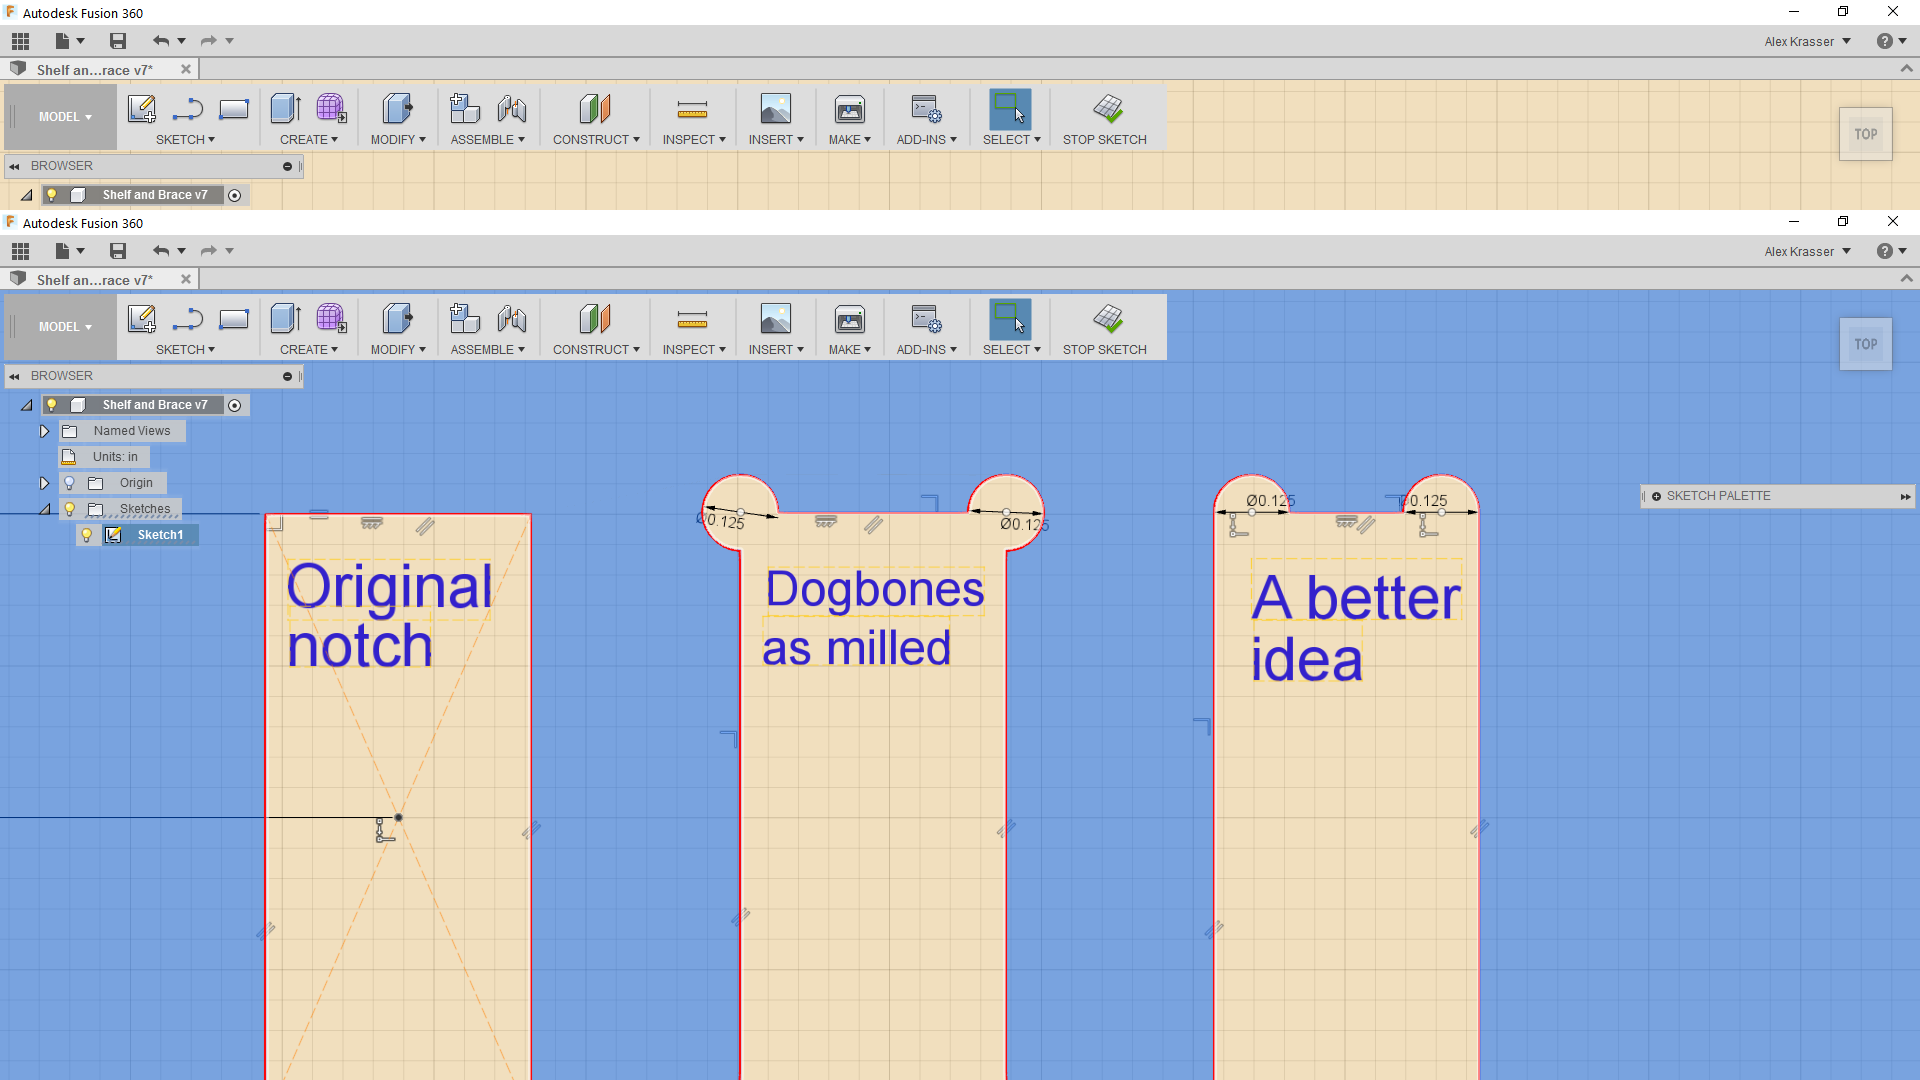
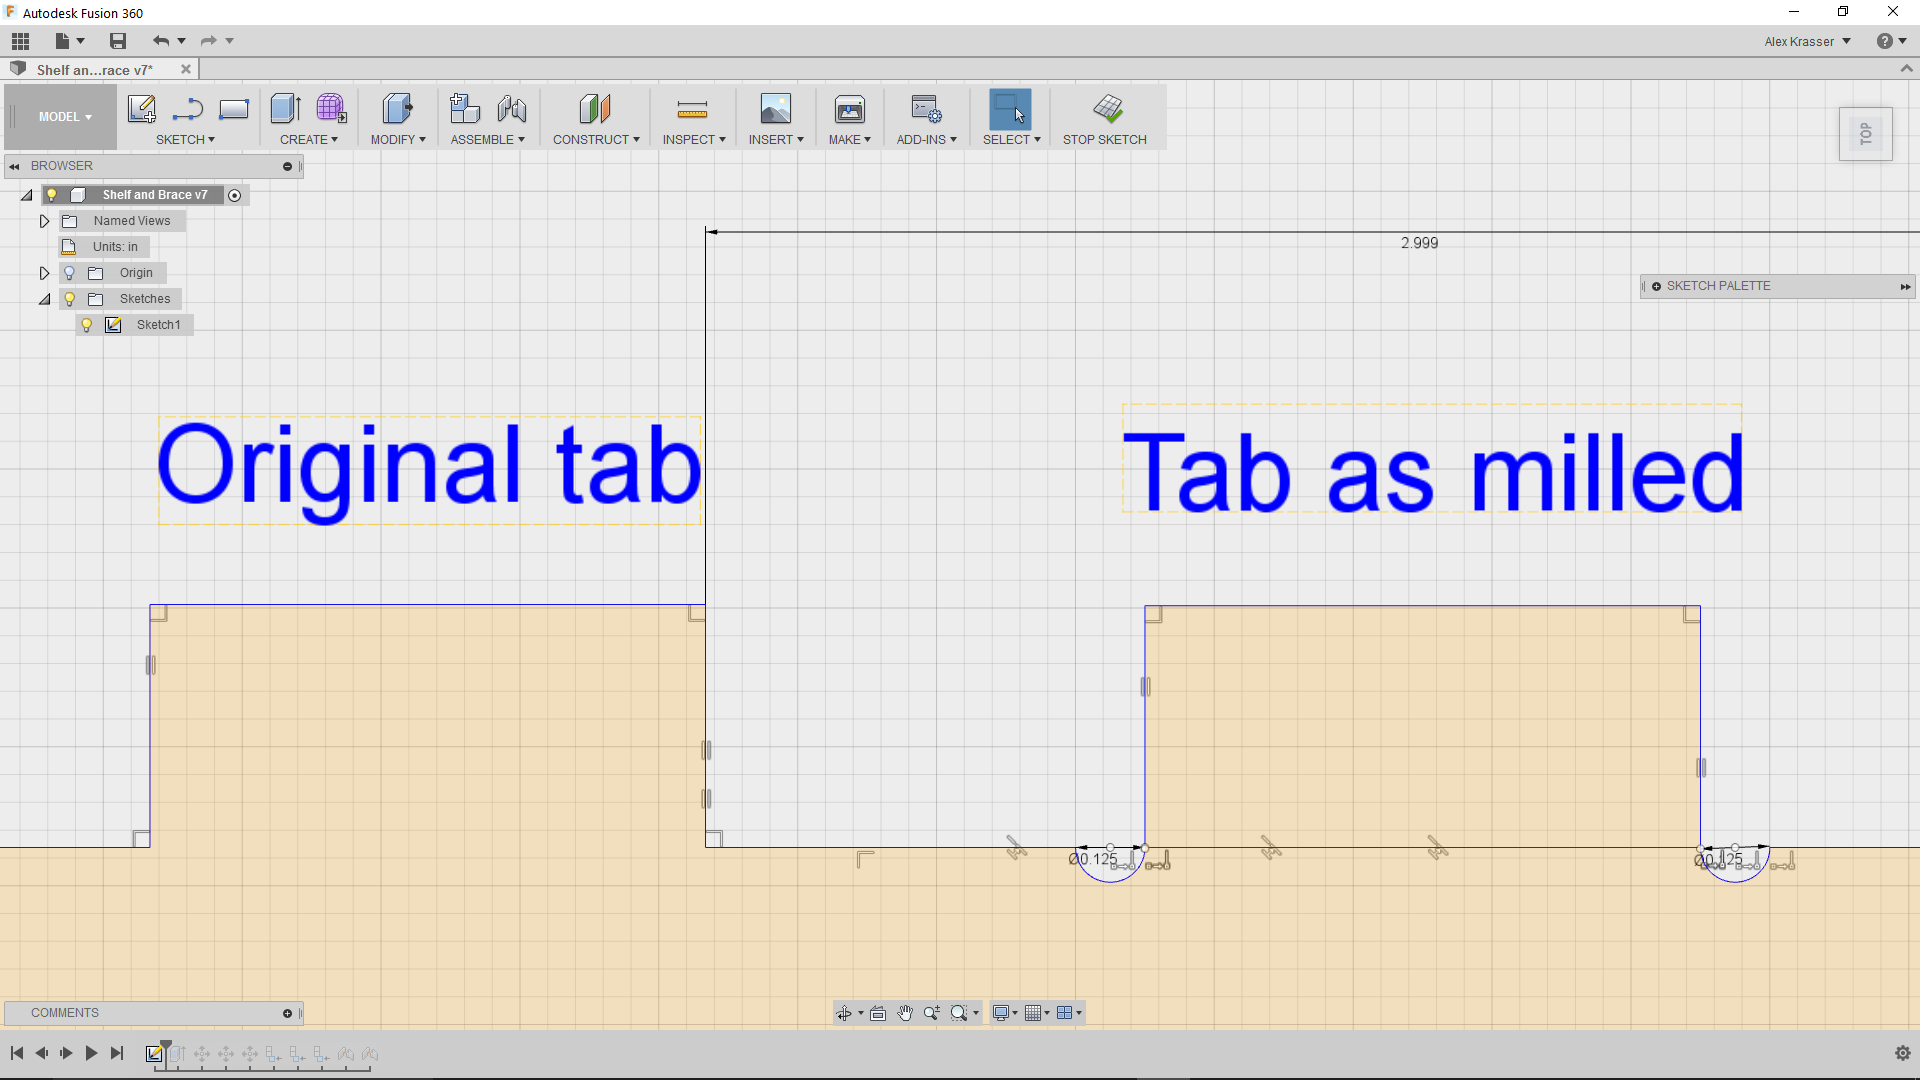
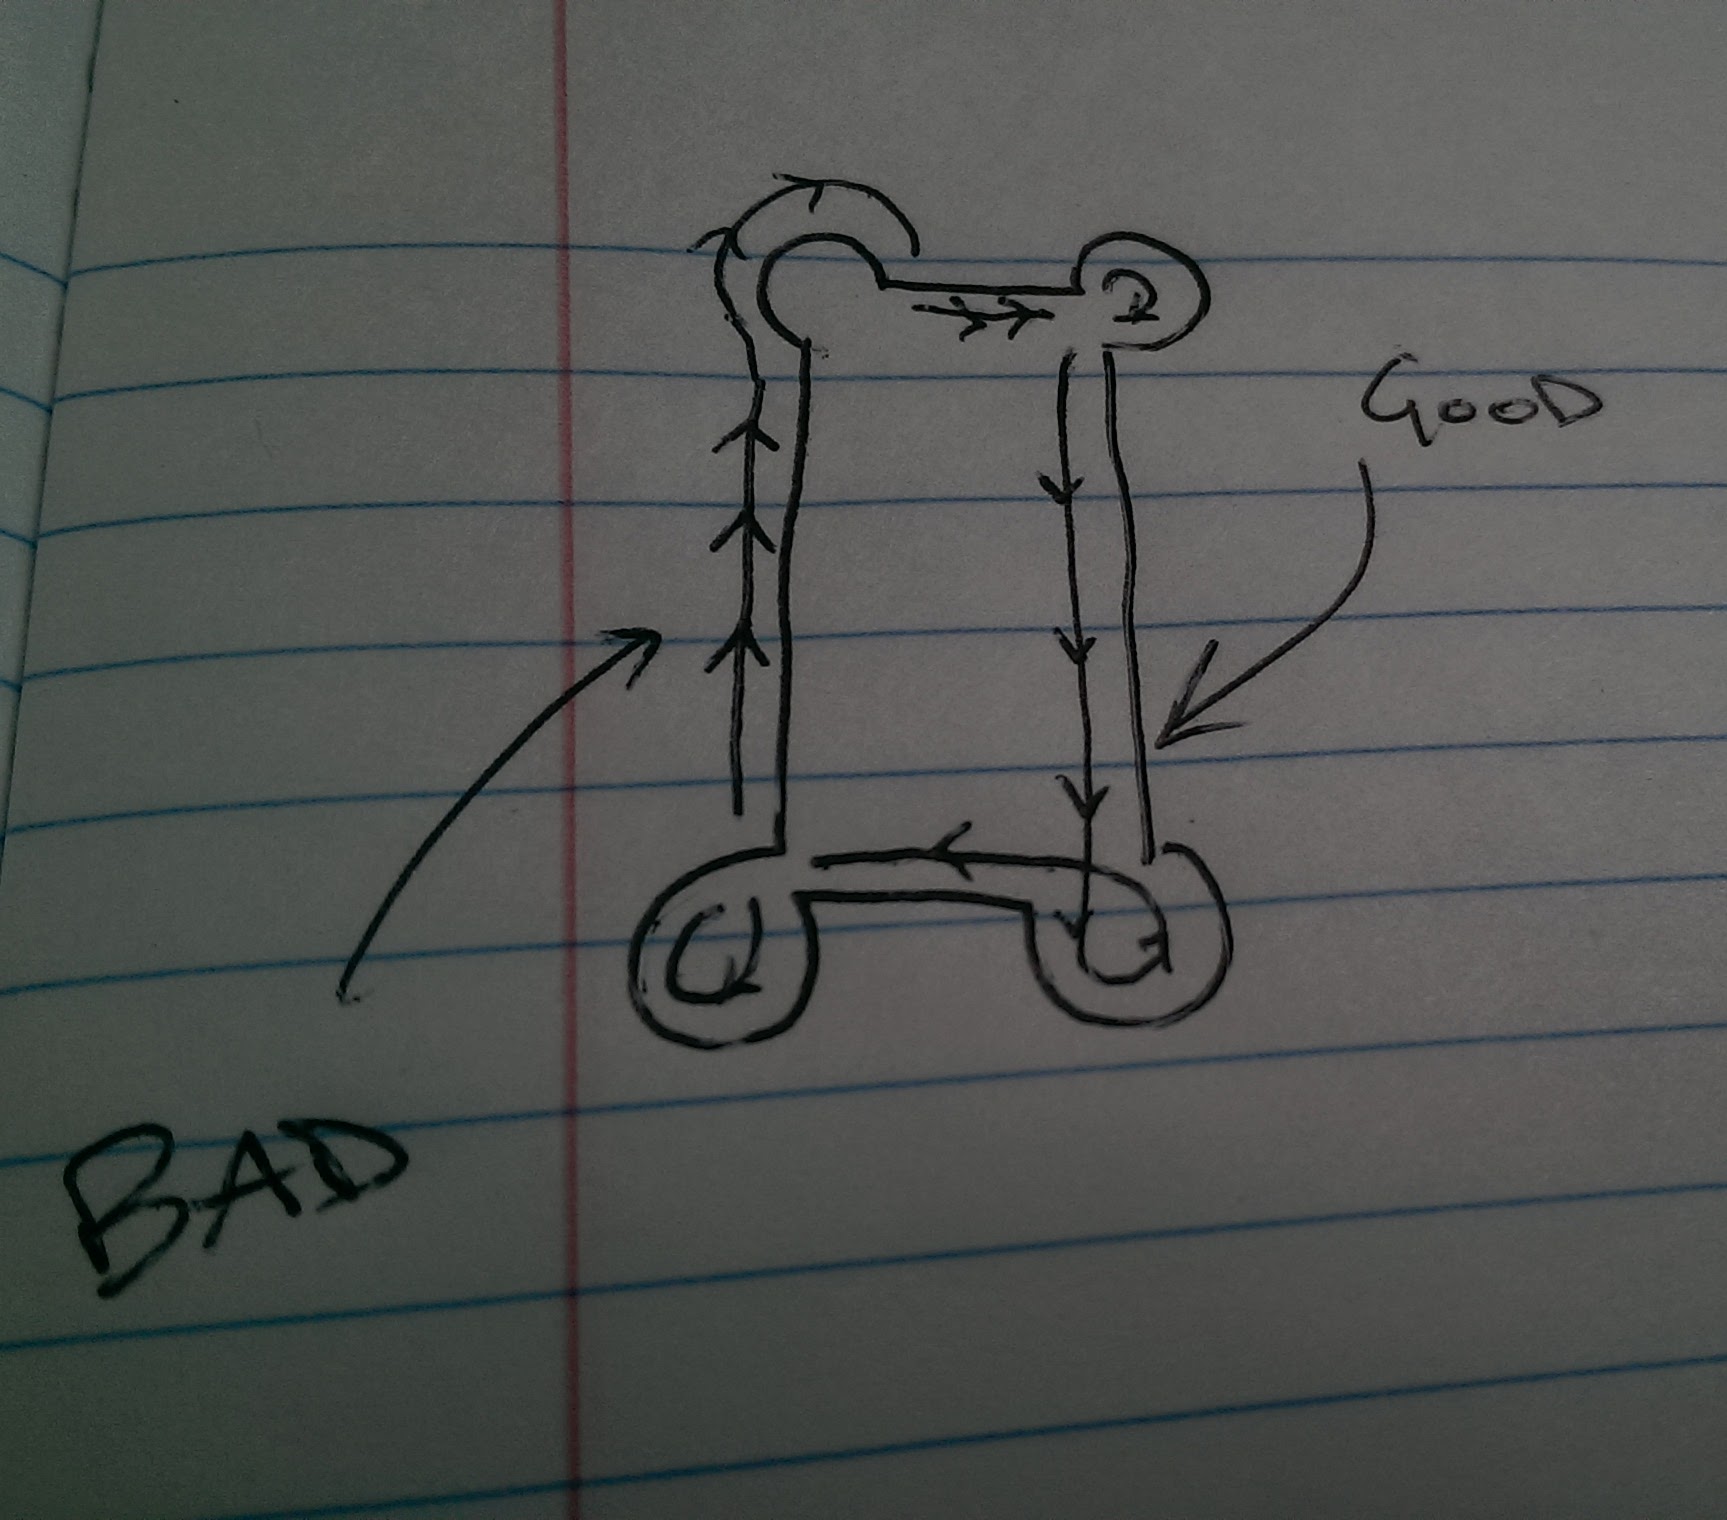
Sharp right angles aren't doable with a round endmill, and I had forgotten to dogbone the corners to ensure tight fits. Once I had my .dxf loaded in to VCarve, I figured out how to add circles to the corners. The endmill I'd be using is 1/8" (.125"), so Rob and I figured that circles with a radius of .125" centered on the extant sharp corner would do the job for the notches. For the tabs, we figured a semi-circle with a diameter of .125", with the edge of the circle on the corner (as illustrated below) would do the job. In retrospect, that's all that was necessary for the notches, too. Oops! Circles in place, I trimmed the unnecessary vectors, and started on the toolpaths.
Rob Hart and I ran into a little trouble with my vectors. In my original Fusion sketch, some of the lines were composed of multiple line segments. I hadn't officially joined them, and this caused a few problems while figuring out toolpaths. When a shape wasn't bordered by a single vector, the router got confused as to which was the "outside" and which was the "inside". As such, it did some vectors on the inside, some on the outside, even for the same shape. (See below sketch. As this is a notch, the inside needed to be removed, not the outside.) The result would have been a disaster. So we figured out how to join the vectors (it's not "weld," it's "close open vectors"), and that solved the problem. Lesson learned: be sure to join all your vectors before exporting from the original sketch!
When I had initally opened the .dxf in VCarve Pro, the X-Y origin was set at some ugly numbers like x=-28.something and y = -11.something. I think this is because I hadn't paid attention to the X and Y = 0 point on my Fusion sketch. Do that next time! Set the lower left-hand corner of the sketch at (0,0). Here's why: when Rob and I tested the first tool path on the Shopbot itself, we zeroed it to the lower left corner of the plywood. As a result, when we tested it by cutting air the first time, it started cutting the air waaaaaaaay off of the plywood. We reset the X and Y zeroes to where they were on the original sketch, rather than going back in to the file and repositioning the entire damn thing. The air above the plywood was properly massacred.
Satisfied, we hit 'go'. Our first complete cut seemed to cut into the sacrificial layer on the final pass. We raised the Z zero by .05 inches (the cutting depth of one pass), and it fixed the issue.
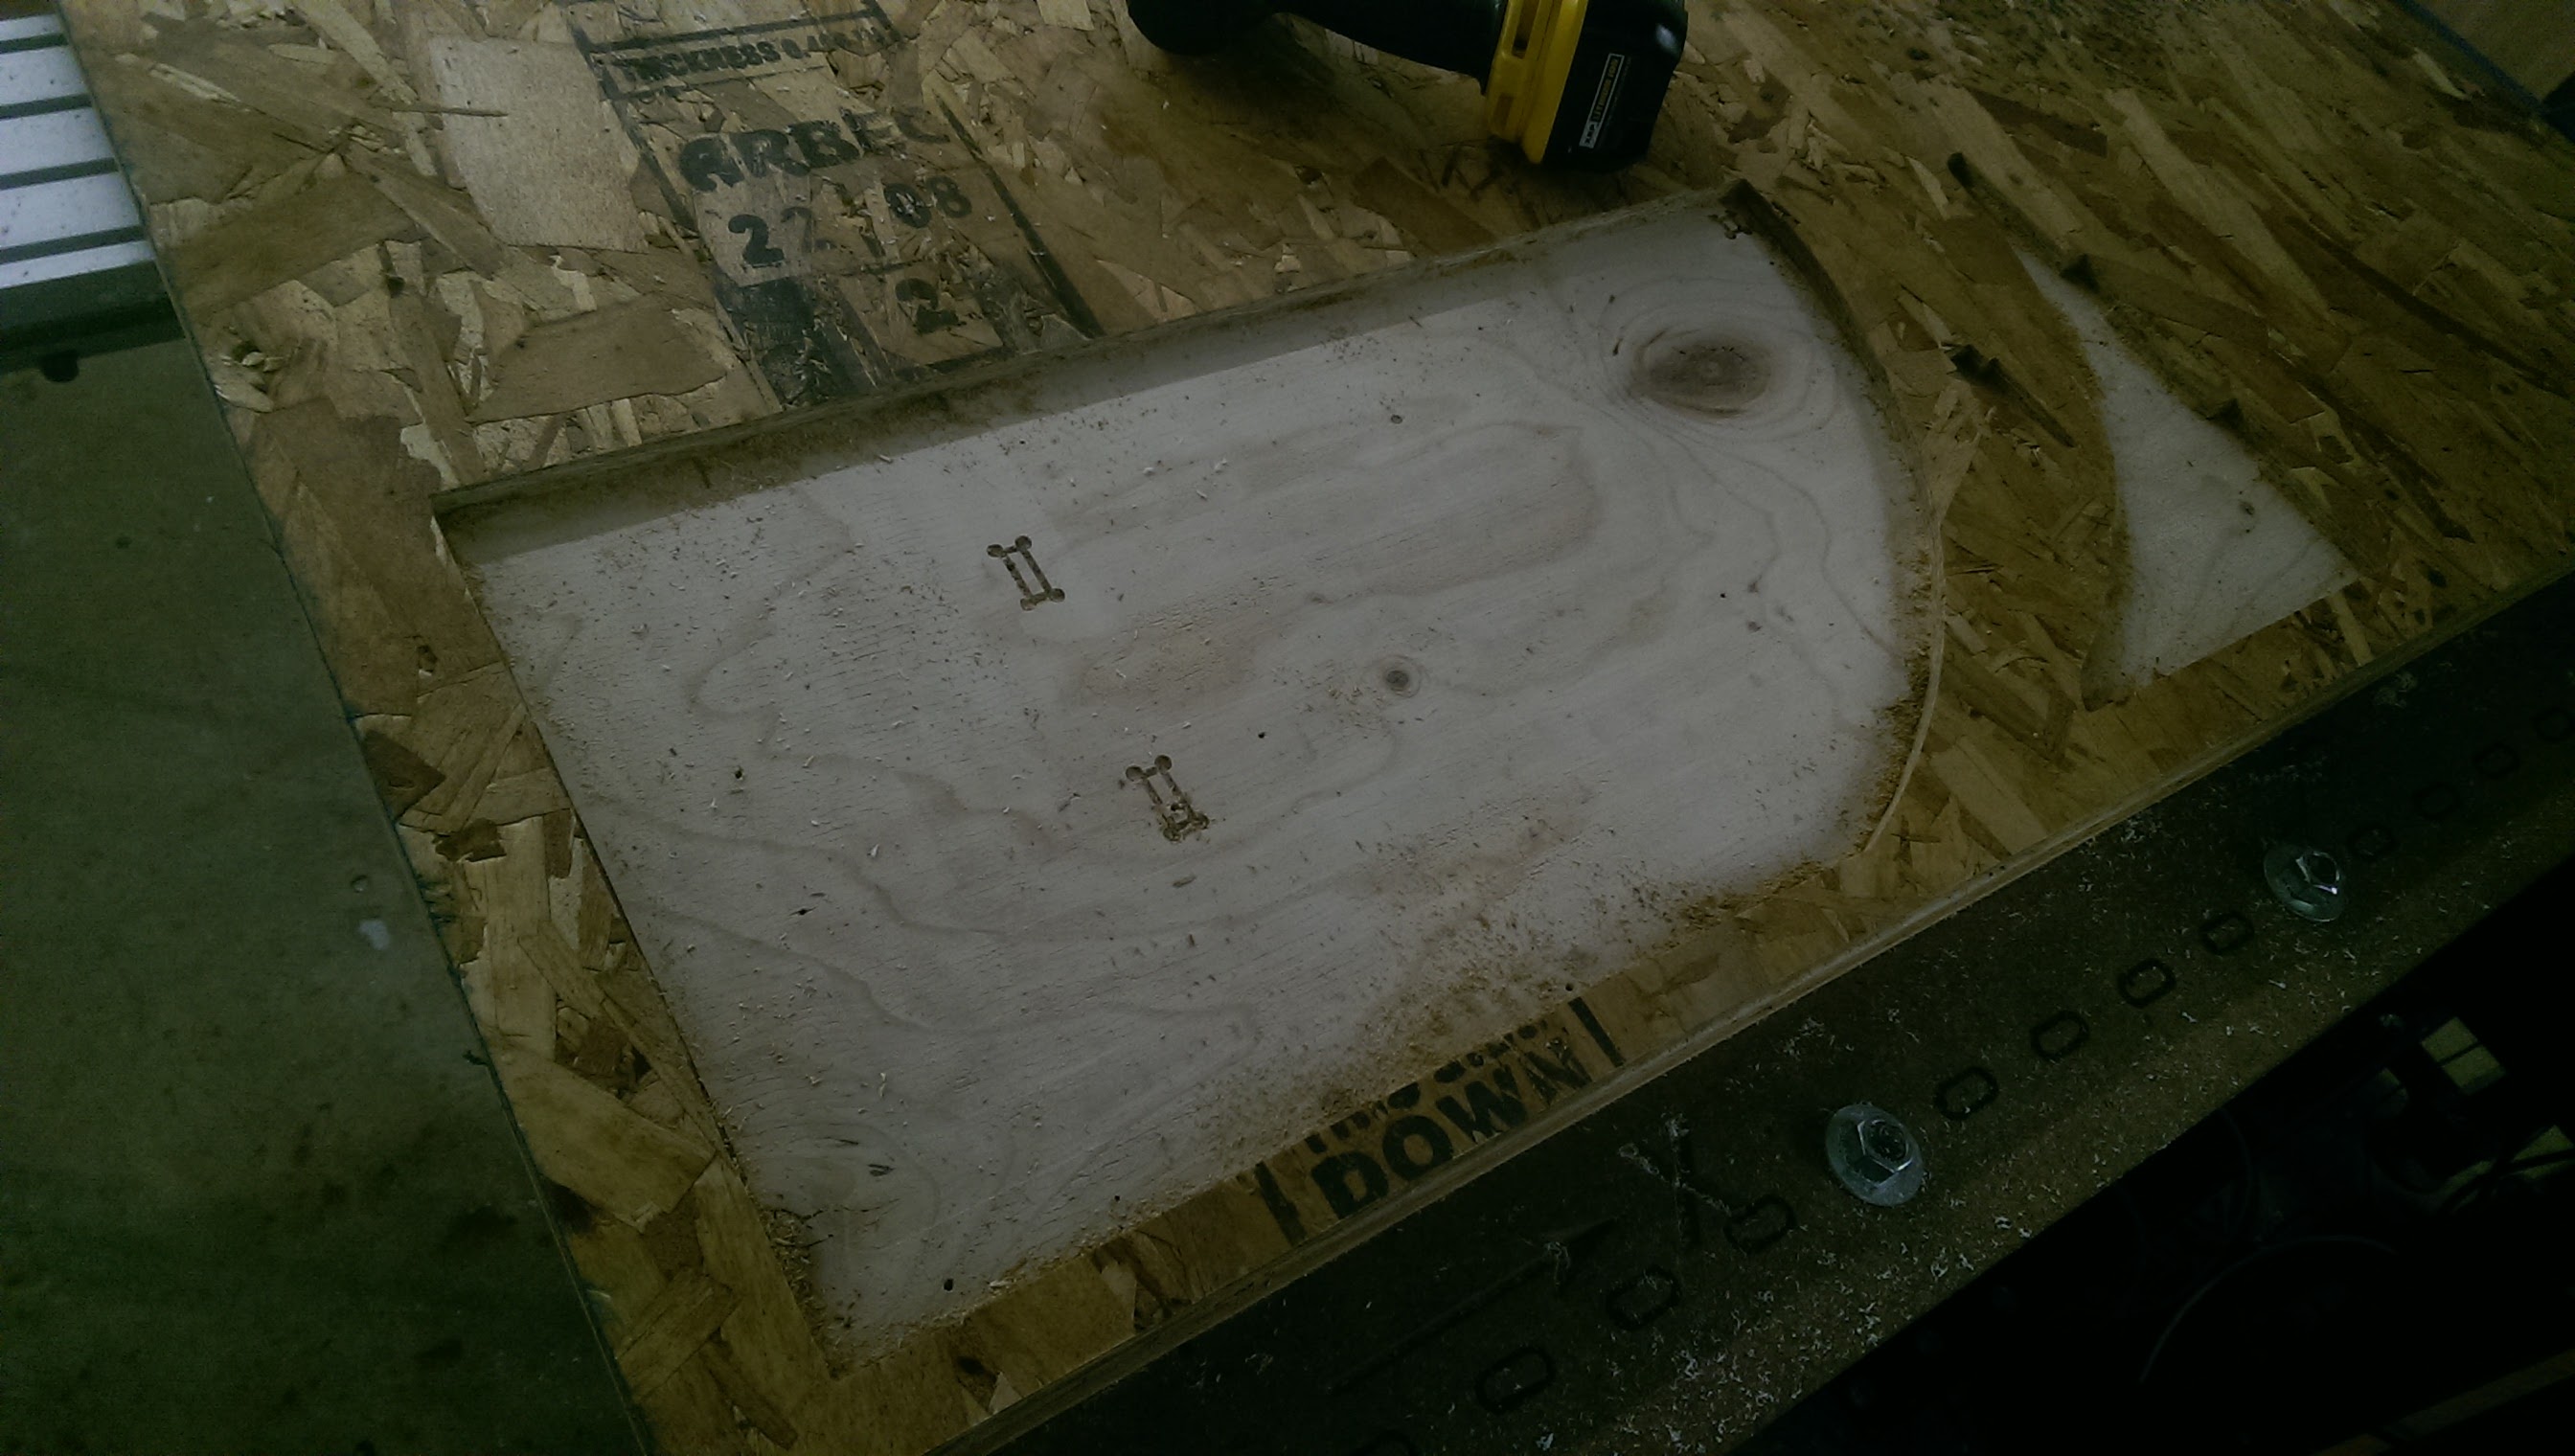
(Notice the lovely dogboned notches etched into the sacrificial layer. That's what it's there for, but don't abuse the privilege!)
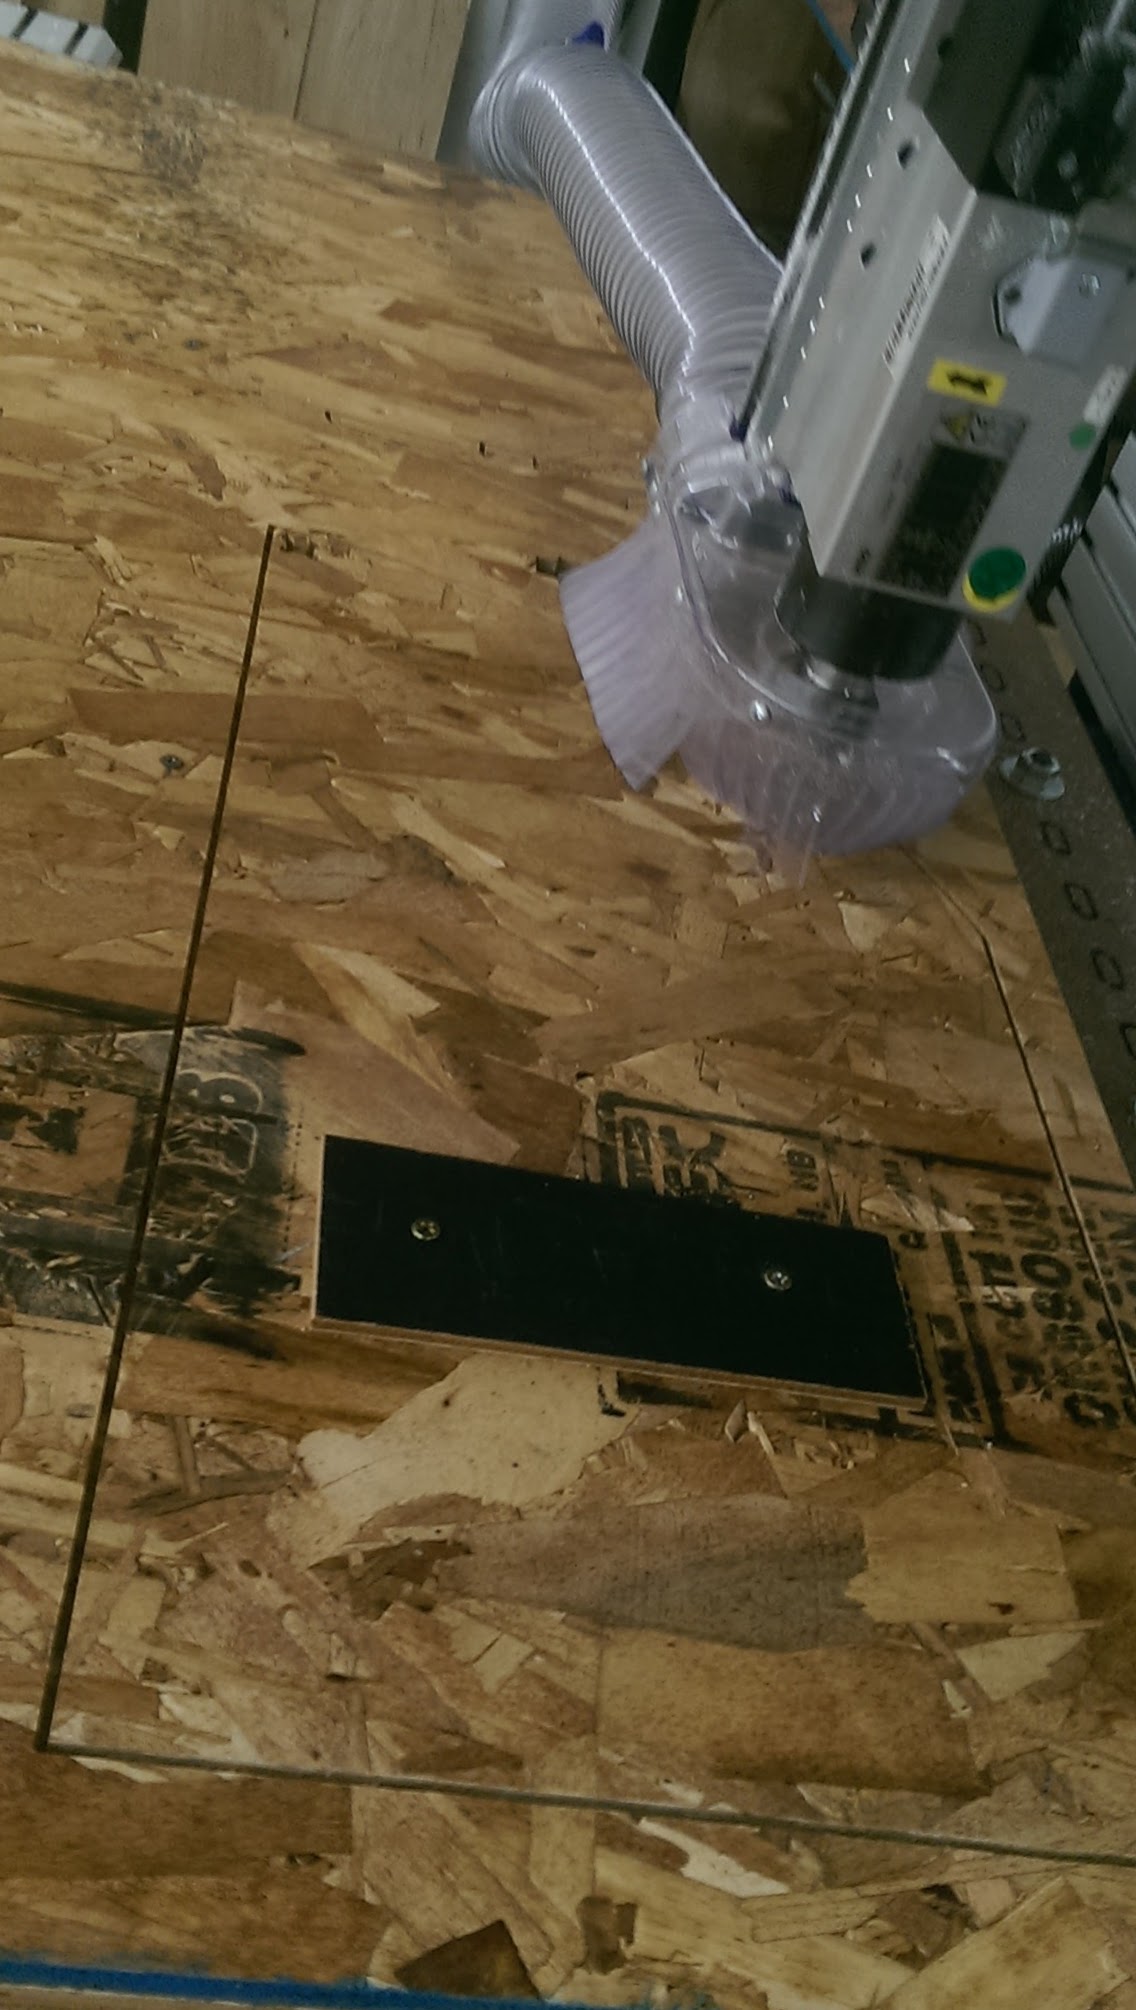
We were sure to cut out the small, inner pieces first. Advice: don't save multiple tool paths in one file, save each tool path (or set of paths for similar small pieces) into individual files! This gives you more control over the order in which things are cut. We had used VCarve to put tabs in to hold the pieces in place, but because of the inconsistent thickness of the plywood, the bottom of the ply was an inconsistent target, rendering the .03" tabs were more or less useless. The first small piece we cut out almost got vacuumed up. To ensure the large piece didn't come loose as it was getting cut out, we used a scrapwood plate, screwed in through the empty holes. It worked like gangbusters.
Assembly! As expected, some light sanding on the top edges of the tabs was necessary to get them to fit. Once the ends got in, some light hammering forced the tabs in place, the ply squished accordingly, and I have some tight friction fits!

(Sorry for the wood-on-wood-on-wood pic, that could've been more clear.)
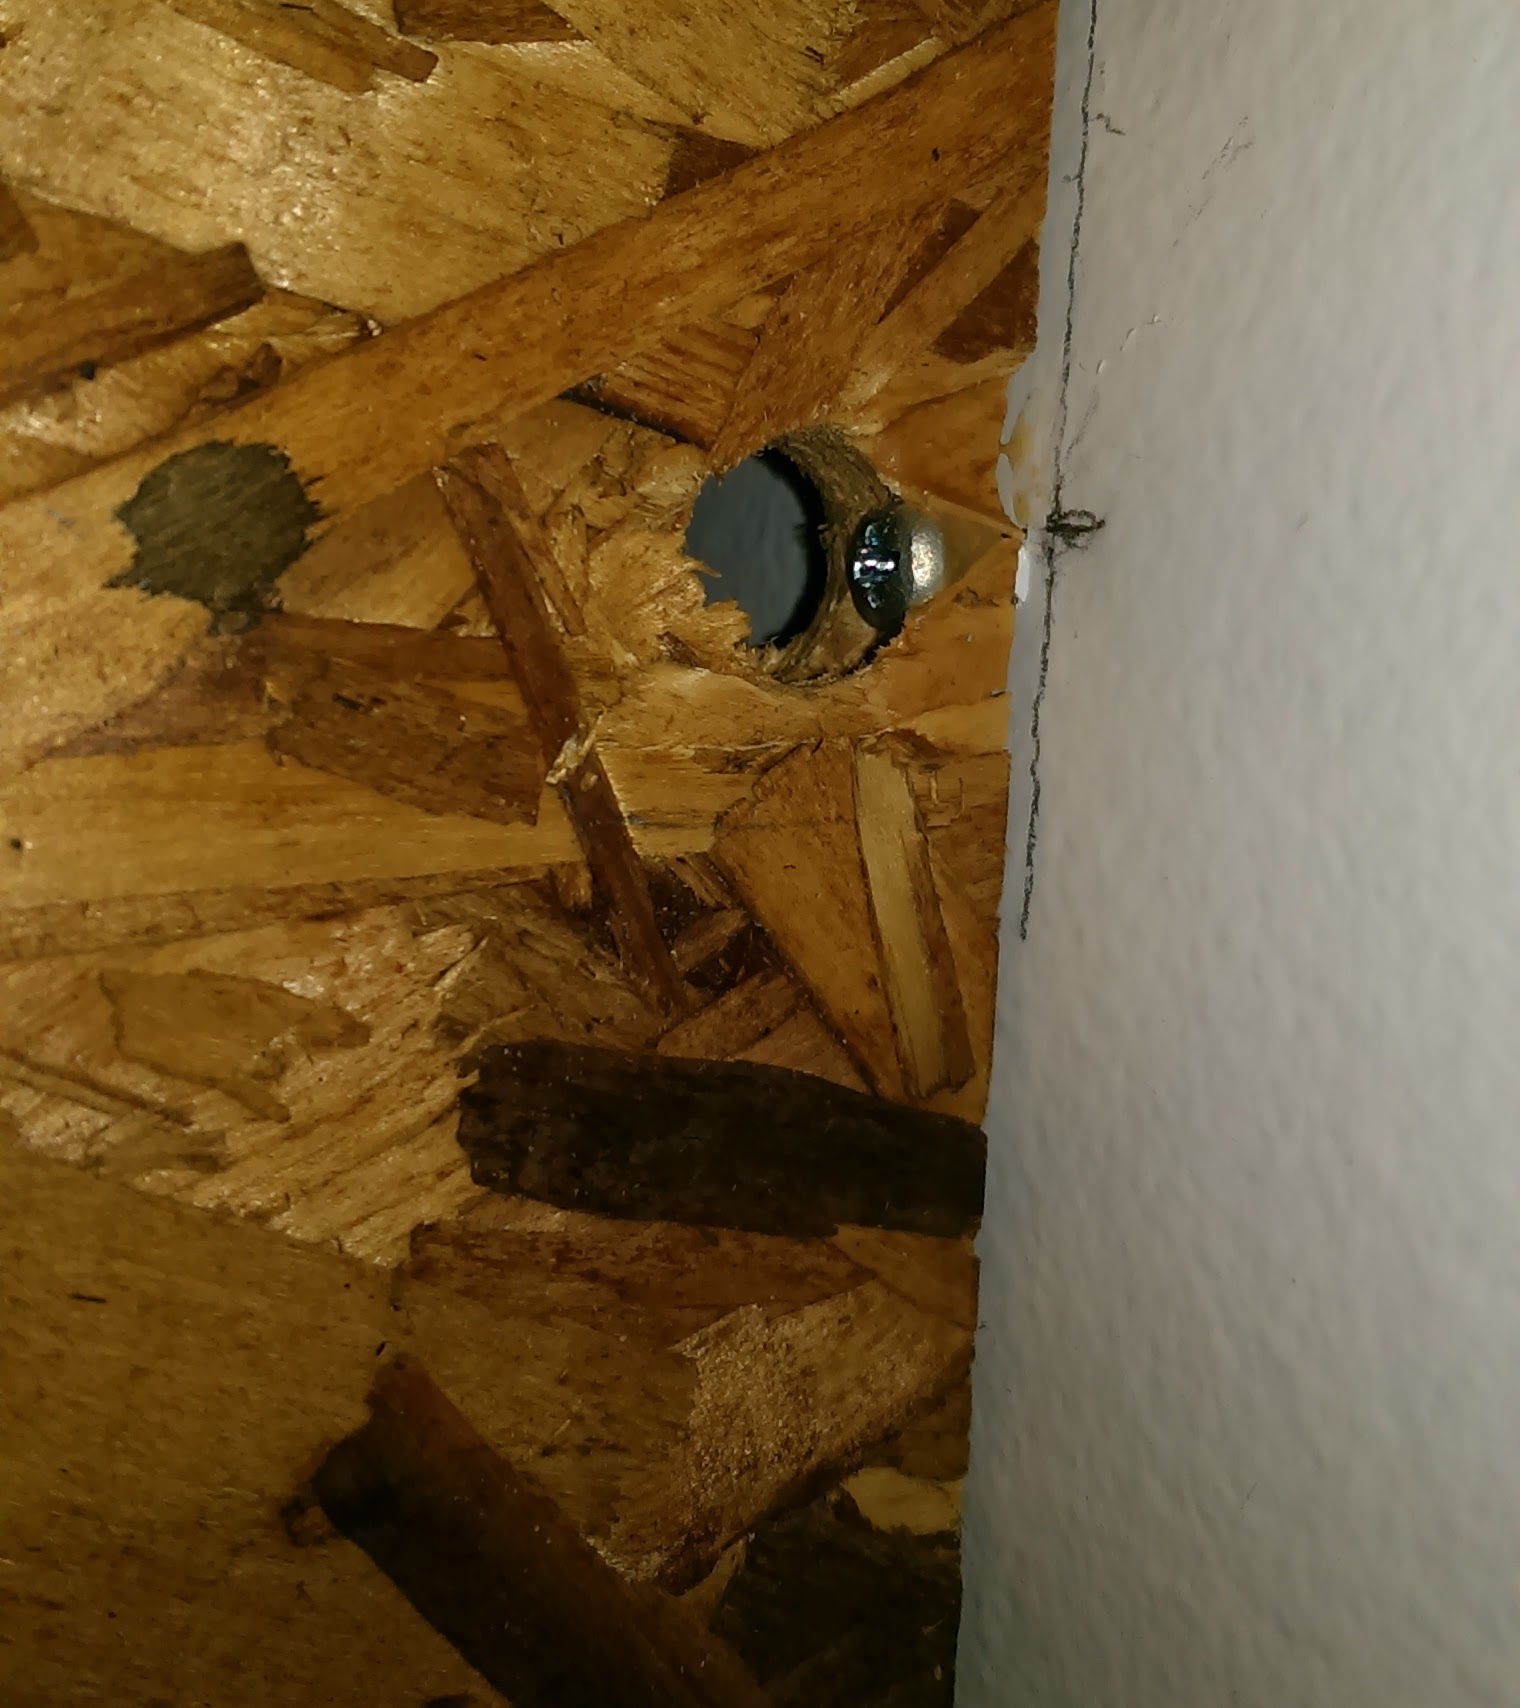
While the tabs fit snugly, in my haste to design the shelf, I neglected to think about how screws would go through the mounting brackets into the wall. To avoid more ShopBot time (and toolpath creation, the true timesuck), I just drilled out a 1/2" hole (the biggest drill bit I have) from the side of the bracket. From there, I drilled a hole the side of the screwhead from the back just below the hole. Just above that, I drilled a hole the diameter of the screw threads. This way, I could put my screw into the wall, then slip the mounting bracket over the screw, and lock it up into place. The OSB sucks, and some of the side of the bracket blew out when I screwed through it. The notch still provided a slot for the screw to sit in, but it's mildly precarious-looking. In theory, all the force it has to deal with is vertical, so hopefully no lateral forces will force the bracket off the screw. I threw some woodglue at it for good measure.
Two other screws went through the brackets just fine, but word to the wise: when screwing into the width of ply, especially crappy ply, drill a pilot hole first, or risk some shelf-ruining splitting!
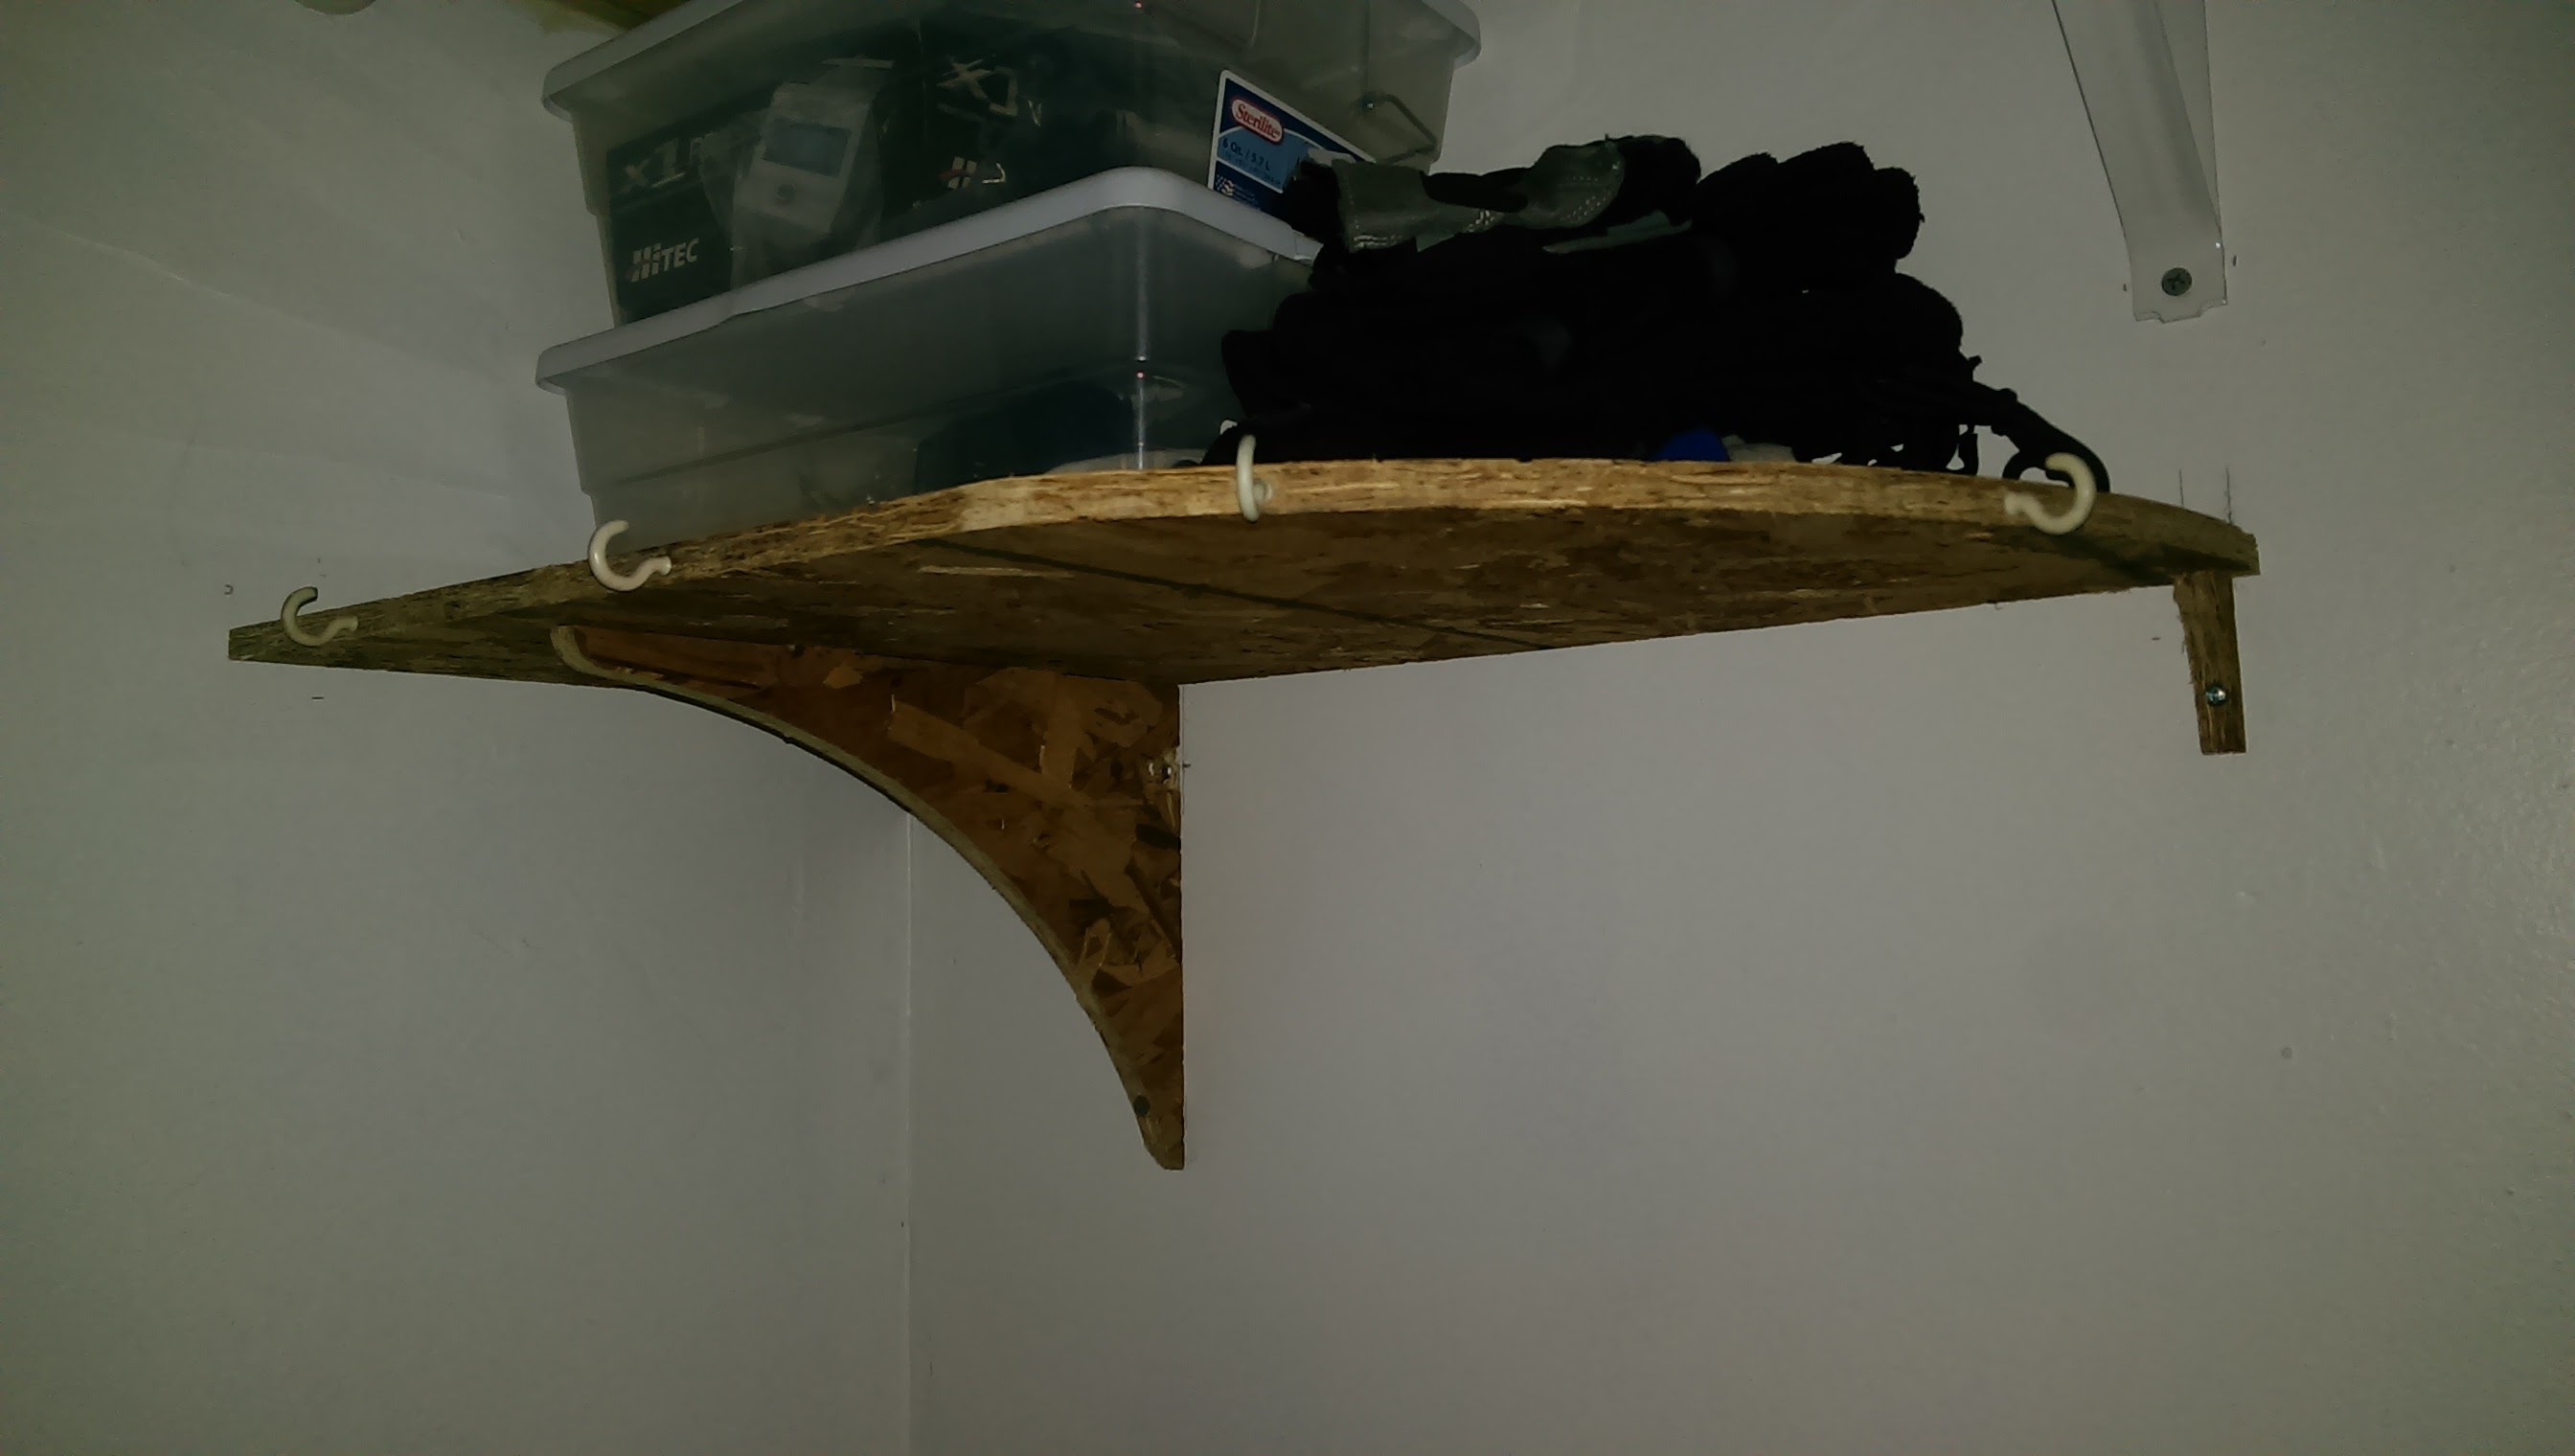
(The addition of some hooks to the edges adds some functionality.)
It's not the most secure shelf in the world, but I'm not planning on storing my glass menagerie on it, so should be good to go!
The shelf was just intended to be a test-cut, but once I got it cut out, I realized I had fulfilled the week's assignment. While I'm likely going to deisgn and cut out a stand for my cuatro (baritone ukelele), I don't need to rush through it for this week.